Have you ever watched an HGTV show and rolled your eyes, knowing it’s not quite an accurate depiction of how it happens in real life? The rise in popularity of home transformation shows has me doing this all the time. As someone who’s always loved a good before and after story, I’m not complaining, but as a professional Stager, I can tell you that there’s a little more to the process than what is seen on T.V.
Staging has been a part of real estate for a while, but only recently has it become the norm. There are still plenty of homes being listed daily in Toronto that aren’t getting staged, but the ones that hope to earn top dollar are. As staging has become more common in real estate and on T.V., sellers are becoming savvy about what they should expect from their real estate agents. If you inquire about staging and your agent shows up with a few pillows and his camera, it’s time to get nervous. From first-time sellers to habitual movers, there’s a certain level of anxiety that always comes with selling your home. There are a lot of unknowns, and for many, an episode on HGTV is the only thing they know about staging. As a Stager who answers clients questions about the process all the time, I thought it would be helpful to break it down for those interested in understanding the home staging process in real life.
Step 1: The Consultation
After clients make the smart decision to sell with the BREL team, they’re connected to me at UPstaging, the staging division at BREL The first step is always a consultation. Clients are relieved to find out that they don’t need to do anything for this step but answer the door. The consultation is a quick tour of the home to document it as is, and assemble a plan to get it ready for staging. Shortly after the tour of their home, they are sent a written document that is basically a checklist of things to remove, tuck away, or address, before their home is staged. The consultation notes are a comprehensive list of everything that needs to get done, no more, and no less.
Pro Tip: The biggest mistake people make is trying to do too much in the lead up to listing their home (the second biggest mistake is not doing enough).
What’s too much? Moving more than they were asked to out of the home, or tackling a renovation project that has gone undone for ten years. While it’s always good to improve your home in any way you can before you list it for sale, try to avoid the temptation to focus on every tiny detail you’d like to fix. You’re moving after all, and if your agent and Stager haven’t noticed that scratch on your stairs, it’s probably something you don’t need to stress about either. Never remove more from your home than you’re asked to because if you haven’t been asked to remove it, it’s going to be used for staging. There’s nothing worse than arriving at a client’s home on staging day only to find out the dining table you planned on using has been removed, and the chairs you expected gone are still there. The consultation process is ongoing and doesn’t make for good T.V., but it’s key to a successful stage.
Step 2: Pre-listing Work
In addition to the written consultation, sellers are provided with a list of any work that needs to be done before their home is ready to list. The consultation notes alone often give the homeowner a fair bit of work to tackle before any transformation can occur, so additional listing work is often contracted out. From painting a bedroom to cleaning up the yard, the pre-listing work is an essential part of the staging process, and at UPstaging, we assist the homeowner every step of the way. With a full-time listing prep technician on the team, many of these things can be taken care of in-house, and for those that can’t, we’re able to organize the work from our long list of trusted partners. Of course, it’s not just the homeowner who has work to do. The period between the consultation and staging day is when the Stagers scramble to assemble everything they need to make the client’s home look as good as possible. Every house is different, and some are easier to transform than others. Many things can be changed before staging occurs (think pea green paint), but many things cannot (think seafoam toilets), and so in addition to decorating the entire home in a day or two, the Stager needs to figure out how to make awkward spaces appear useful and unfortunate features look more presentable.
Related| 30-day Guide to Preparing Your Home for Sale
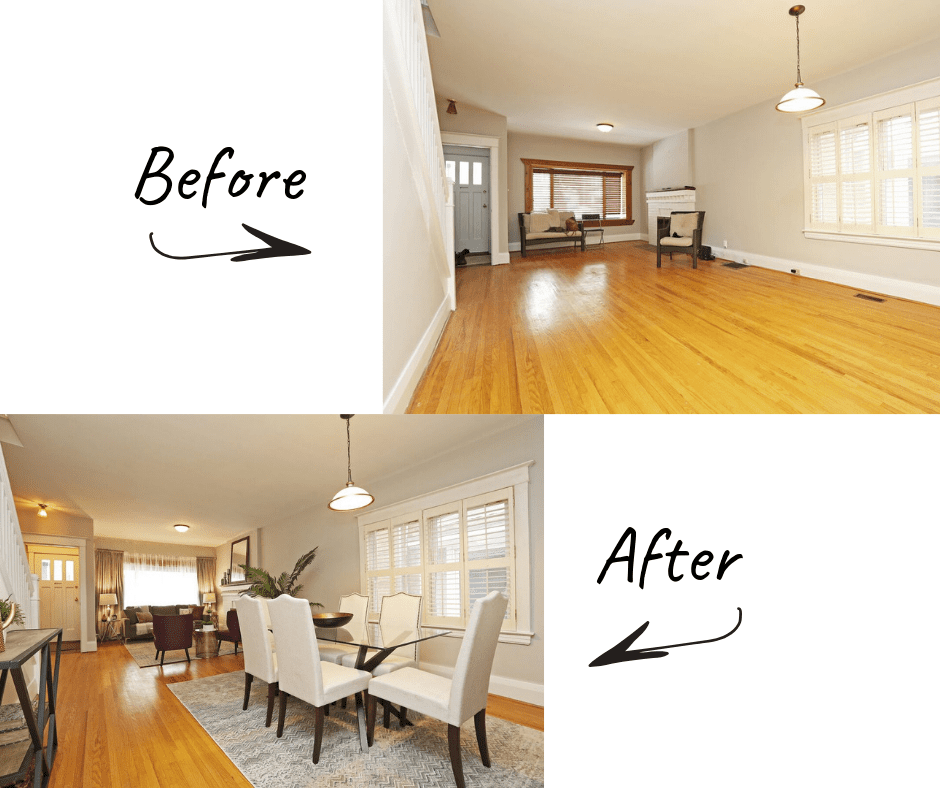
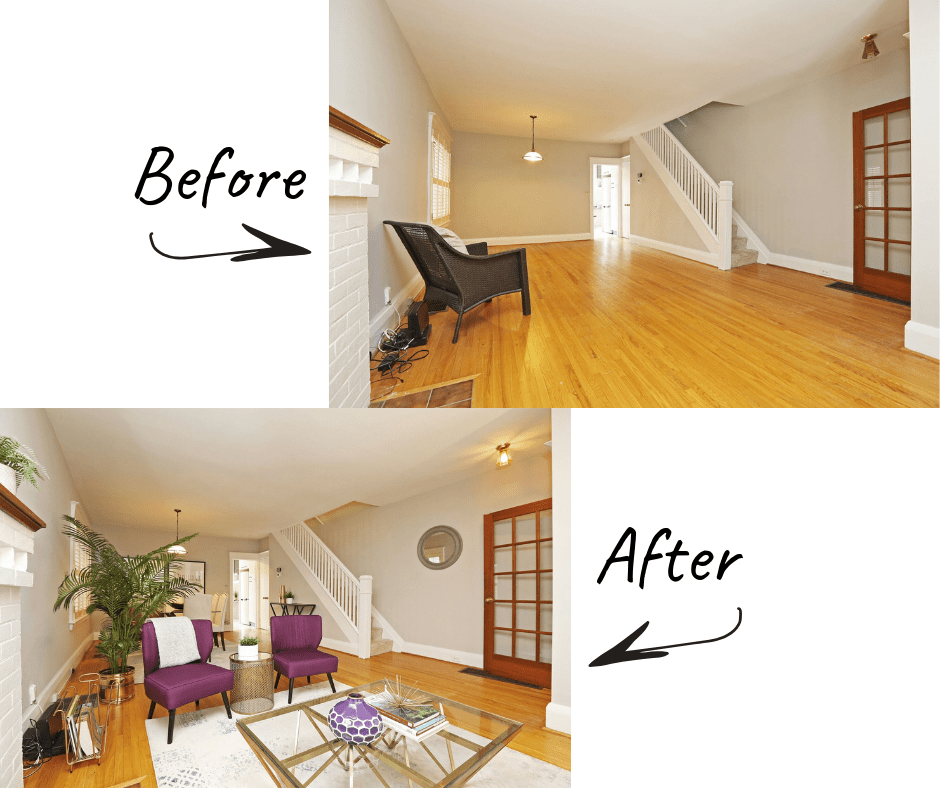
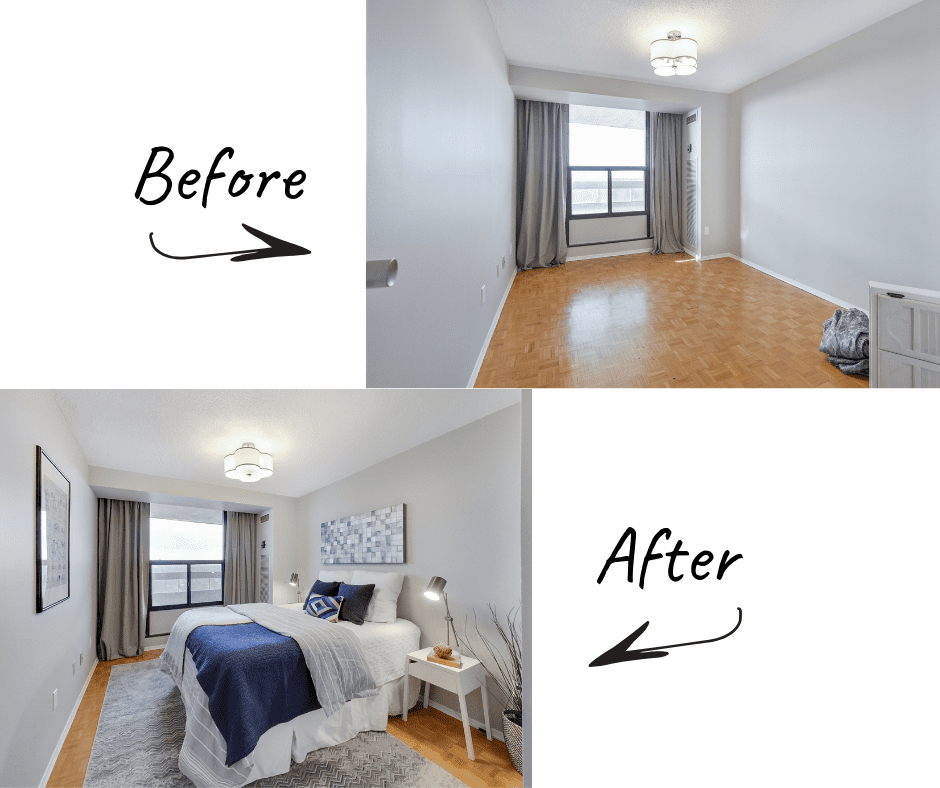
Step 3: Staging
The period between the consultation and staging day can be anywhere from a week to several months. It all depends on the timeline you and your agent have agreed upon. With the staging day set shortly after the consult and all of the pre-listing work complete, staging usually takes 1-2 days. Clients leave their homes in the morning and return to a fully staged, camera ready, future-buyer loving home. Every room has been meticulously planned with furniture from our warehouse, which would put any Homesense to shame. We’re continually updating our inventory to provide clients with the most current styles, and we have a wide variety of furniture and accessories to choose from, so your home gets a tailored look. If your home needs something and we don’t have it, we’ll source it.
We don’t look good unless your home looks great, and everyone wins when your home sells for top dollar.
Of all the steps, the staging day is the only part that makes for good T.V. and only a fraction of the day at that. There’s nothing glamorous about moving furniture and finding a decade’s worth of dust bunnies underneath it to clean, or realizing you have an hour left to finish before a photographer arrives and you’re running seriously behind schedule. Who knew the back gate didn’t work and the torrential rain would mean you’d have to clean every piece of furniture and the entire floor before finishing for the day?
Photography
Like staging, photography is an essential part of marketing in real estate, and we always schedule it immediately following the staging so that your home is ready for its close up. If you’ve ever wondered what professional photography and staging can do for your home, take a picture of your living room and then look at a picture of a similarly sized living room in the pages of your favourite design magazine. Which one says ‘buy me?’ Professional lighting, styling, and photos transform a space, especially when they are viewed online. Twenty years ago, people took pictures of homes that were neat and tidy for the most part but lived in. Fast-forward to today, and we’re seeing more and more homes looking like they could be the feature story of Vogue Living. Online marketing of properties allows more buyers from further away to see your home, and in order for them to be interested, your home needs to look as good or better than the others it’s up against- enter the rise of staging and professional photography as an essential service in real estate. Our photographers take a range of HDR photos, from the typical wide-angled real estate shots to lifestyle shots, and often include 3D virtual tours and floor plans, so potential buyers aren’t left guessing about the details of your home. Good photography can make good staging look great, and the opposite is always true.
Even in my attempt to sum up the staging process in more detail, I’ve inevitably left out a lot of details (problems might be a more accurate description) that arise on just about every job. Though I’m guilty of watching more than my share of them, staging shows on T.V. don’t quite capture the reality of staging in real life. There’s a lot of planning and hard work involved by the agent, homeowner, Stager and photographer that doesn’t always make for great T.V. but always makes for an improved sale. If you’d like the staging of your own home to go off without a hitch as you’ve seen on T.V. be sure to ask questions, be informed, and most importantly follow the plan your Stager has put in place to a T.
Author: Kiel Storms. Read more about him here.